Planet Name:
Arnhim
Planet Description: Green Agri-planet, limited industrial capabilities.
Notes: See the mission tree below for Mission paths. Naturally you may adjust maps to match scenery available unless noted otherwise, and point spread to match models and armies involved. See the WarHammer 40K rule book and the Space Marine Codex for detailed mission objectives and descriptions.
Contents:
| Scenario |
| Mission Tree |
| Mission Descriptions |
| Mission Path Campaign Results |
| Suggested Mission Maps |
| Contact |
| Return to Scarpia's WH40K |
Description:
The planet Arnhim is a key holding in the offensive in the sector.
Invading forces have become stalled in their drive to take the planet,
and in order to end the war quickly, look for a new strategy.
Invading troops, lacking support, are dropped into an advanced area in
order to secure the important bridge in Arnhim Town over the river Quam.
Simultaneously, a large ground force will try to punch its way to the
air-dropped troops though the main lines of the planetary defenders, along a
narrow highway. Arnhim is a agri-planet with a fair industrial base.
Notes:
This campaign is made up of two different battle plans. The first is Operation
Bazaar, in Arnhim Town, where the air-dropped troops will be fighting it out
with the defenders for control of the bridge. These are meant to be small battles,
without a lot of heavy support, especially for the invading force. The plan,
Operation Patch, is meant to be a large-scale affair, with a lot of tanks and
heavy support involved. Both of them should be fought on maps that have a lot
of choke points. (See sample maps)
Description:
Invading troops are dropped many miles behind enemy lines in order to secure
a strategic bridgehead.
Due
to the difficulties of the drop, and in order to represent the delays in reinforcements,
no vehicle choices (except walkers), may be chosen by the invaders until mission
4.1 or above. This includes unit transports. In order to represent the delay
in reaction to the drop, Defending troops may not take heavy vehicles
(except walkers) until mission 3.1 or above. However, both transports
and fast attack are allowed.
Description:
Invading forces are trying to smash though the defender’s lines in order to
meet their airdropped compatriots.
Special Rules:
As
this is a mobile invasion force, the invaders may substitute on additional heavy
choice, provided the heavy choice is a vehicle. Heavy gun batteries, or foot troops (i.e.: devastator squad)
are not allowed for the added unit. In
order to take this addition, one less elite unit is allowed.
No changes are made to the defending units.
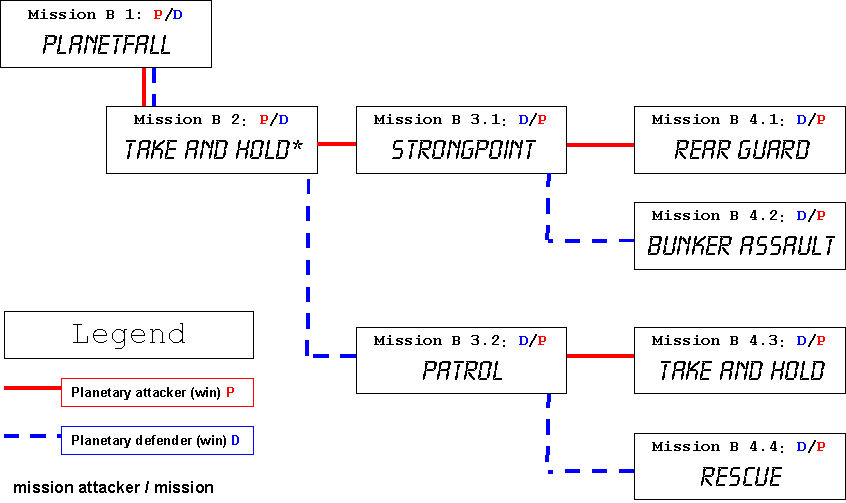
Operation
Bazaar Mission Tree

Operation Patch Mission Tree
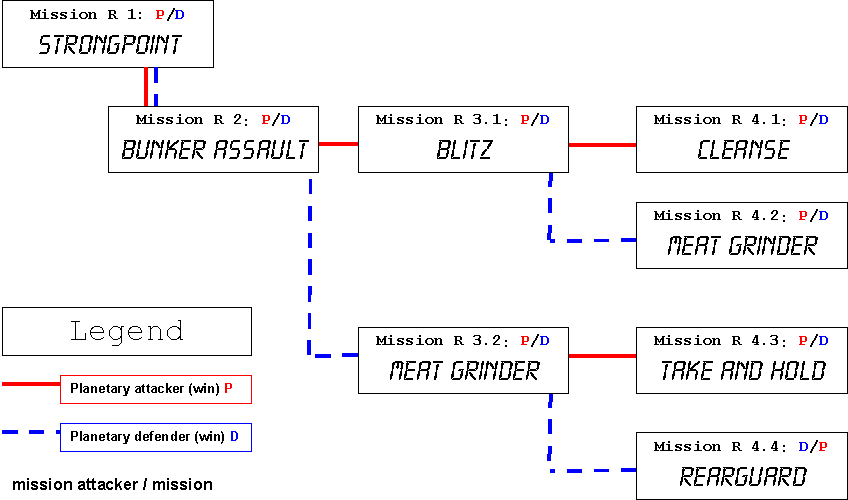
Battle reports, where available, are listed after the mission name.
|
Operation Bazaar Missions |
|||
|
Mission |
Map |
Force Size |
Description |
B 1: Planet Fall
Battle Report |
Countryside |
1000 |
Dropping
from space, invading forces attempt to quickly locate and eliminate defending
leaders. |
|
B 2: Take and hold* |
Bridgehead |
1000 |
Invading
forces attempt to grab and secure the bridgehead. NOTE: Objective must be a bridge, and must be centered between the armies
involved. All other mission descriptions remain standard. |
|
B 3.1: Strongpoint |
Hold It |
1500 |
Invading
forces, after securing the bridgehead, defend their position. |
|
B 3.2: Patrol |
Countryside |
1500 |
Defending
forces, having defeated the attempt at the bridge, patrol the area looking
for additional invading forces. |
|
B 4.1: Rear Guard |
Hold It |
1000 |
Invading
forces continue to defend their acquisition. |
|
B 4.2: Bunker Assault |
Bridgehead |
1500 |
Having
taken back one half of the bridge, defending forces push to reclaim it
all. |
|
B 4.3: Take and Hold |
Bridgehead |
1500 |
Invading
forces, having been pushed back, make one last attempt at capturing the
bridgehead. NOTE: Objective must
be a bridge, however objective may either be set up as mission B 2, or
as in the mission description. |
|
B 4.4: Rescue |
Countryside |
1000 |
Defeated
and crushed, invading forces attempt to prepare to retreat by evacuating
their high security devices. |
|
Operation
Patch Missions |
|||
|
Mission |
Map |
Force
Size |
Description |
|
R 1: Strongpoint |
choice |
2000 |
Attack! Invading forces launch the relief column
direct into the defender’s lines. |
|
R 2: Bunker Assault |
choice |
2000 |
The attack continues as invading forces continue
to try and make their way against the defending forces. |
|
R
3.1 Blitz |
choice |
2000 |
Having broken though the main part of the defending
line, invading forces try and race to the relief of the bridgehead troops. |
|
R
3.2 Meat Grinder |
choice |
2000 |
Defending units, having stopped the invaders in
the bunker assault, try and hold the line against a renewed assault. |
|
R
4.1 Cleanse |
choice |
2000 |
With sweeping momentum, invading forces attempt
to remove all opposition between them and the bridgehead troops. |
|
R
4.2 Meat Grinder |
choice |
2000 |
Defending forces reinforcements arrive, and a furious
battle erupts as the two armies clash. |
|
R
4.3: Take and hold |
choice |
2000 |
Unable to advance to the bridgehead, invading forces
attempt to secure a good, defensible position. |
|
R
4.4: Rearguard |
choice |
2000 |
Beaten back, invading forces try and make it back
to their initial starting point. |
Each mission carries with it a 500-point victory
award to the winning side, above and beyond all other point awards.
Planetary
Invaders:
In order to claim a clean victory, the planetary
invaders must have fulfilled the following two conditions:
1.
Must have control of both sides of the bridge from Operation Bazaar.
2.
Must make it to mission R 4.1 (Cleanse) OR win Mission R 4.2 (Meat Grinder)
in Operation Patch.
In order to claim a disputed victory, the planetary
invaders must fulfill all of the following conditions:
1.
Hold at least one half of the bridge at the end of the Operation Bazaar
2.
Must have one the final battle in Operation Patch (missions R 4.1, 4.2,
4.3, 4.4)
3.
Must have higher total victory points than the planetary defenders
Planetary
Defenders
Any other result is a victory for the planetary defenders.
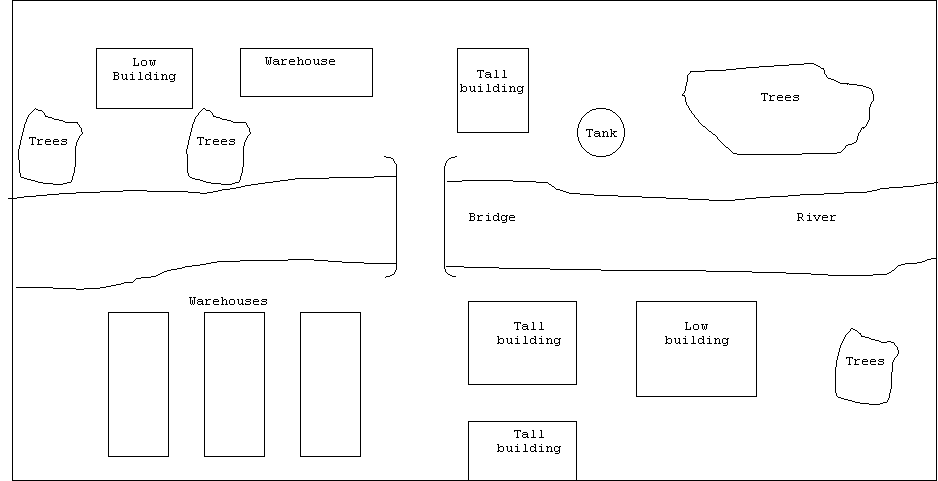
The following are suggested maps to be used with this campaign.
Operation Bazaar Maps
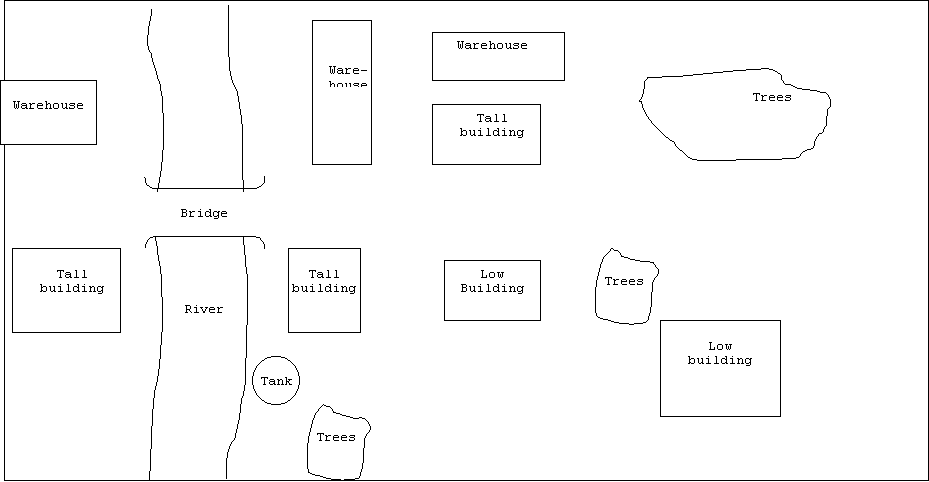
Map Name: Bridgehead
Map Notes: River should be no larger than 6” wide
in order to allow the use of jump troops. Bridge should be large enough to fit
any vehicle, but no larger than 8” wide. Trees count as difficult terrain, and
you may not shoot over or through them.
Map Name: Hold It
Map
Notes: River should be no larger than 6” wide in order to allow the use of jump
troops. Bridge should be large enough to fit any vehicle, but no larger than
8” wide. Trees count as difficult terrain, and you may not shoot over or through
them.
Map Name: Countryside
Map Notes: Trees count as difficult terrain, and you may not shoot over or through them.
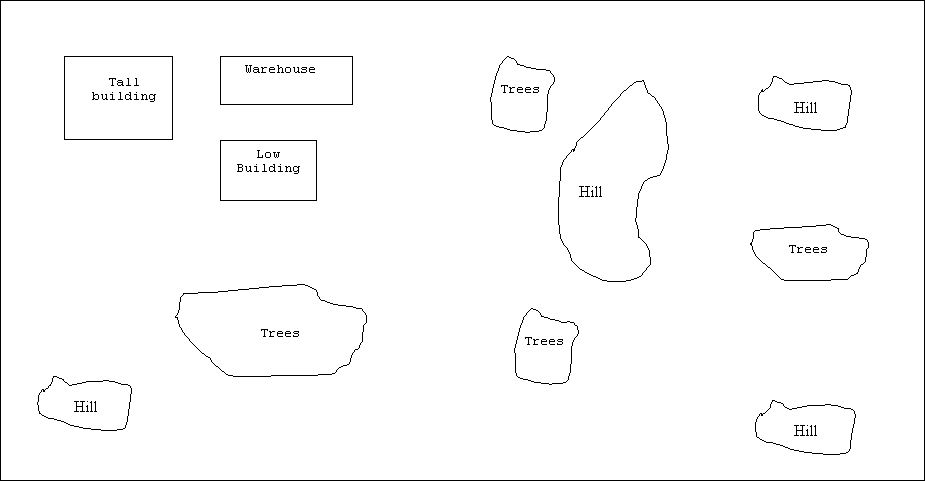
Operation Patch Maps
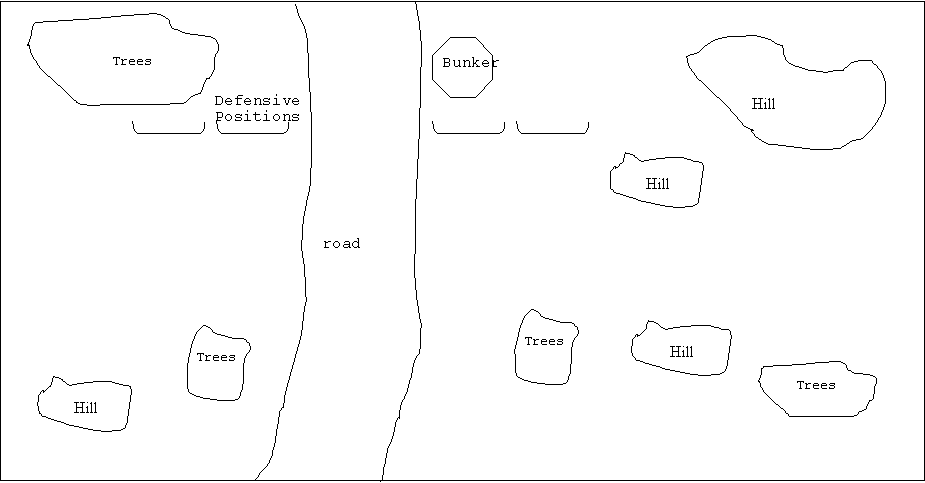
The maps for Operation Patch are in themselves not
important as far as the layout of terrain is concerned. Use whatever items are
at hand, as long as the following conditions are met The map on the bottom is
provided only as an example:
Defensive Positions: There must be substantial defensive positions defending the above road, and per any individual mission description.
