
As seen in White Dwarf North American Edition, #309, October 2005!
As a submission to a competition on the WAAAGH, here are some barricades, orkizized! I'm happy to provide complete instructions and pictures (below).
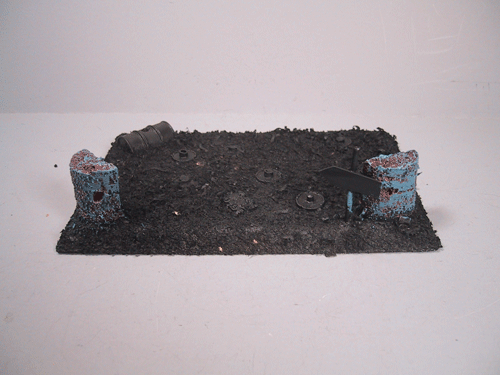
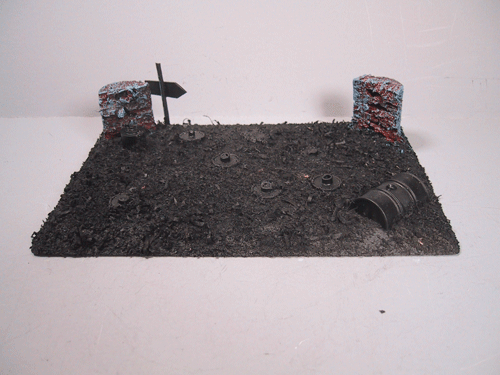
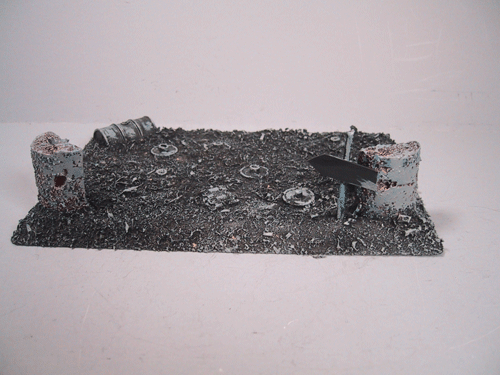
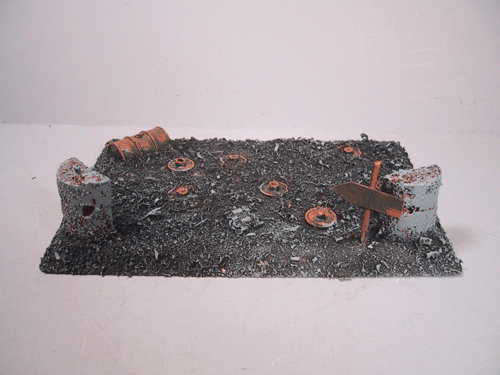
Completed 7/08/05
Modeling
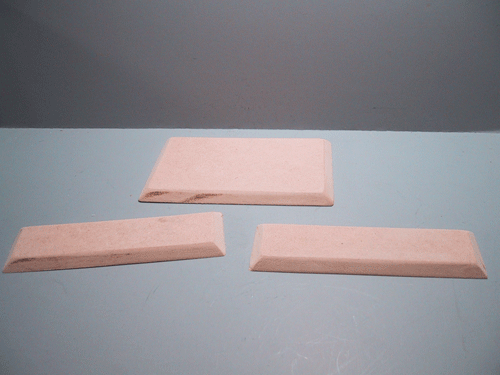
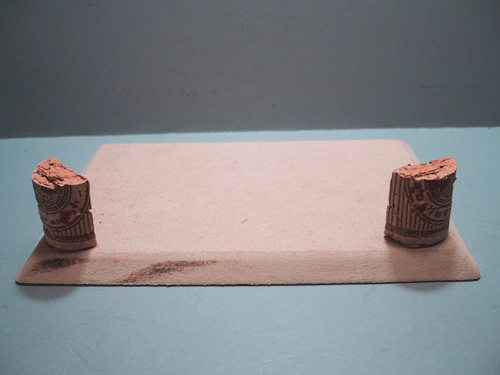
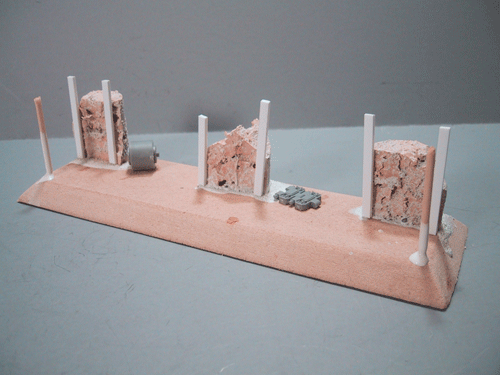
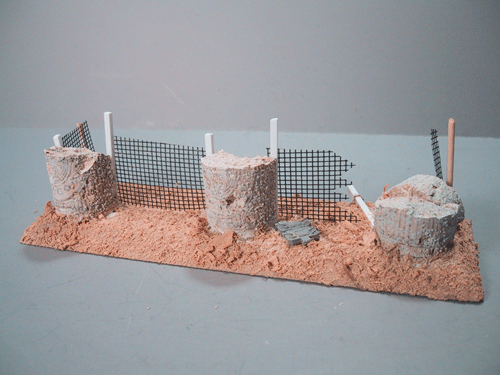
First step was cutting 1/4" mdf board for base pieces. The edges were rounded and smoothed. The large center section is 4 x 6 inches, the others 2 x 6 inches.
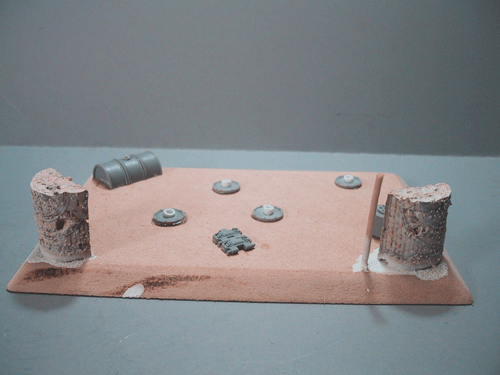
Used wine corks were cut in half lengthwise, and than in half again to make the base of a concrete vehicle barrier. The cork lends itself well to a crumbled texture.
To apply the concrete surfacing to the model, create a concrete mixture of 1 part gesso, 1 part pva glue, one part modeling sand, and two parts water. Stir this mixture well and keep stirring while using. Brush and dab this mixture onto the concrete areas of the model; past experience has shown that more thin coats looks better in the end than one thick coat, so feel free to modify the formula above to suit your needs. Allow each coat to dry before applying the next one.
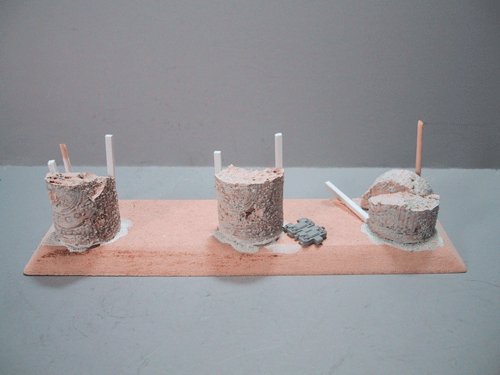
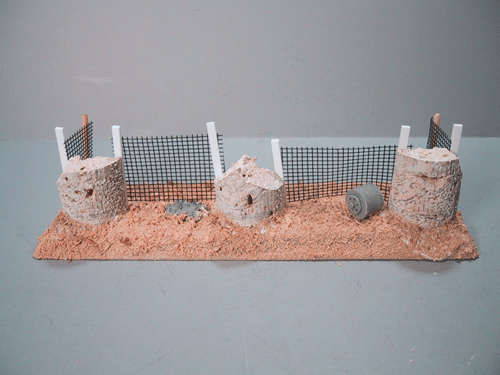
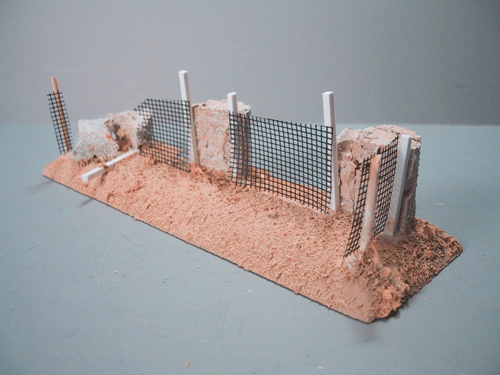
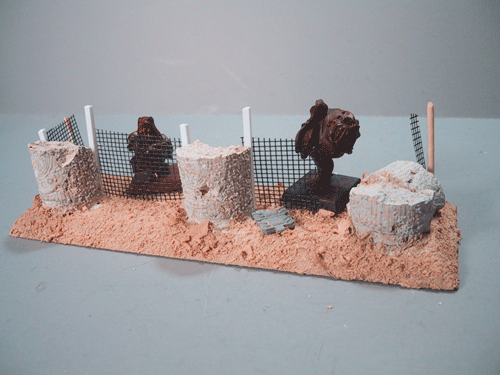
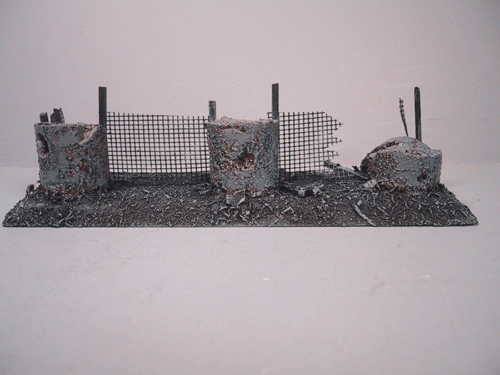
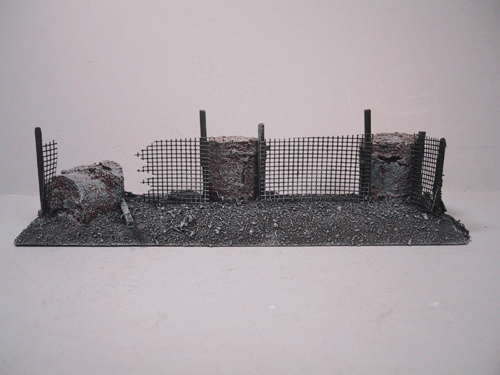
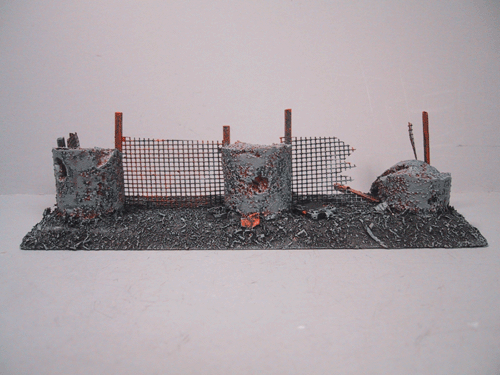
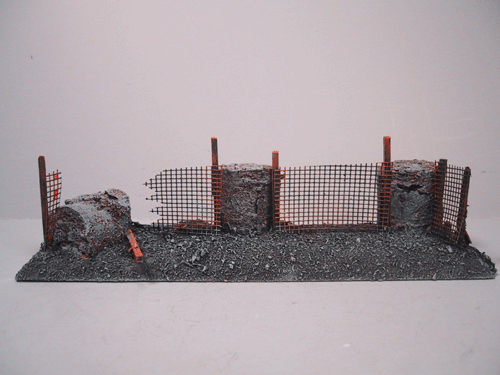
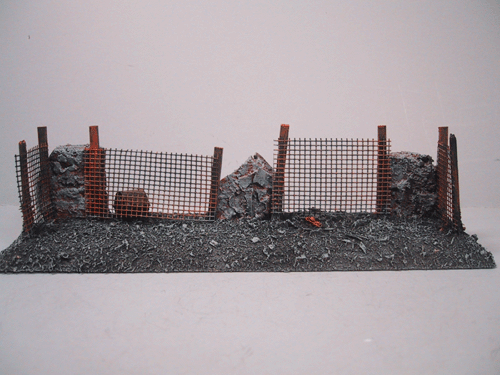
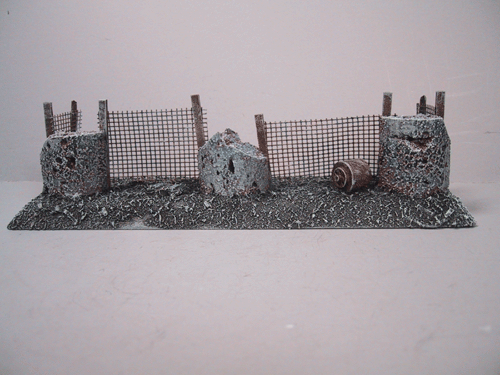
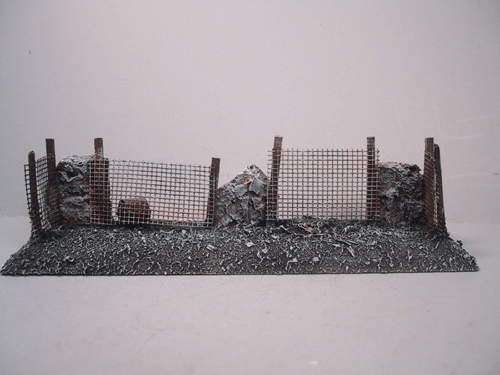
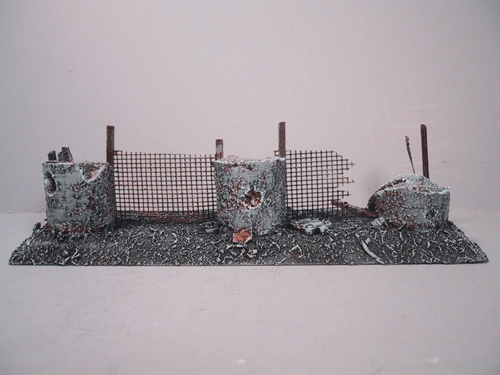
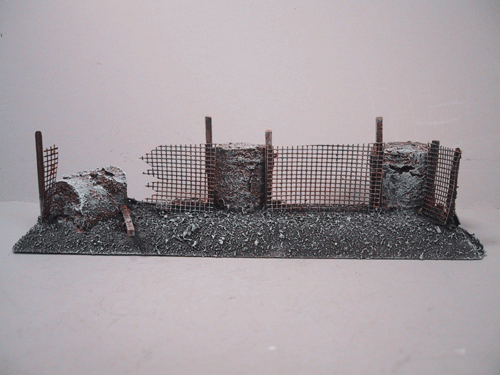
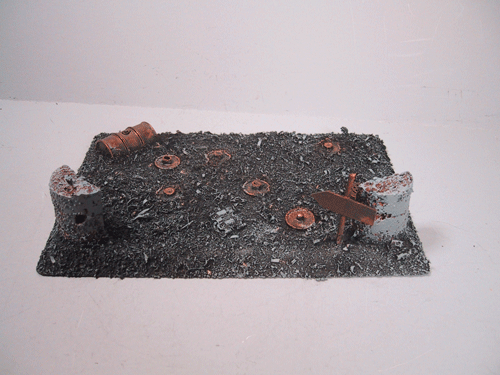
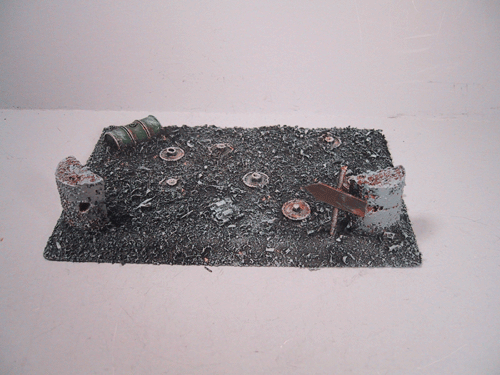
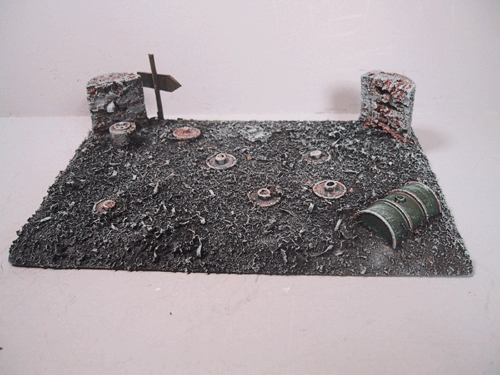
Stakes, both plasticard and toothpicks, were glued on with super glue after the concrete work was complete. Small pieces of debris can be added, the tank track sections need to have the lower tabs cut off before gluing.
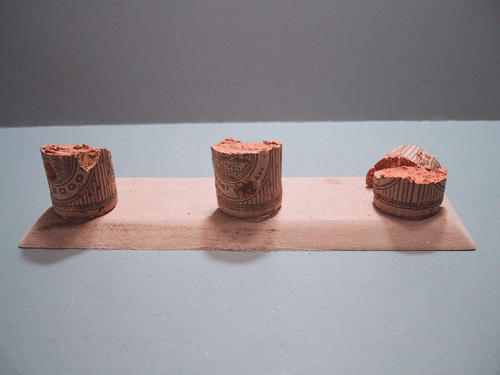
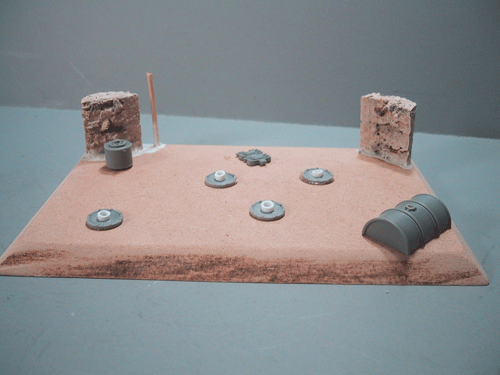
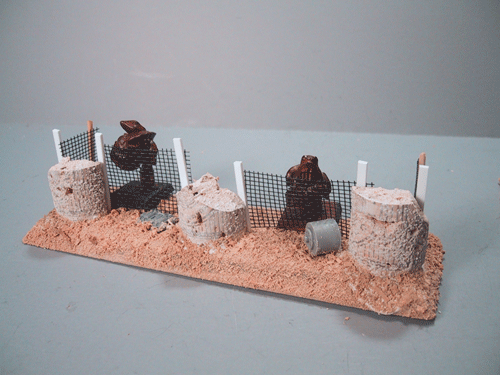
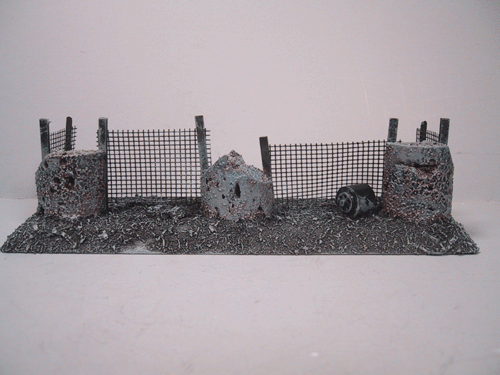
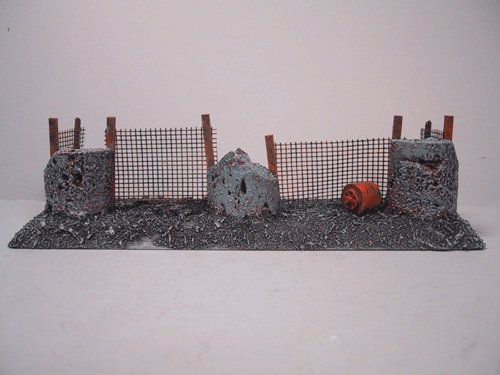
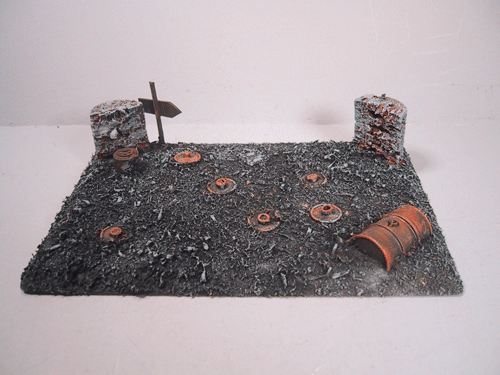
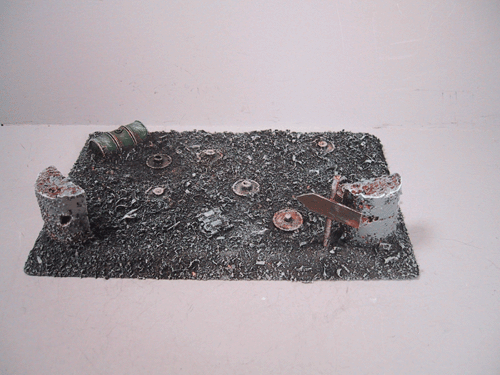
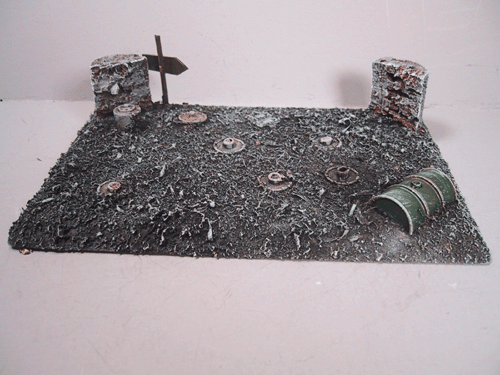
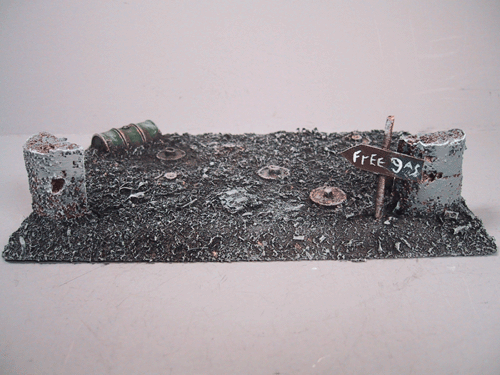
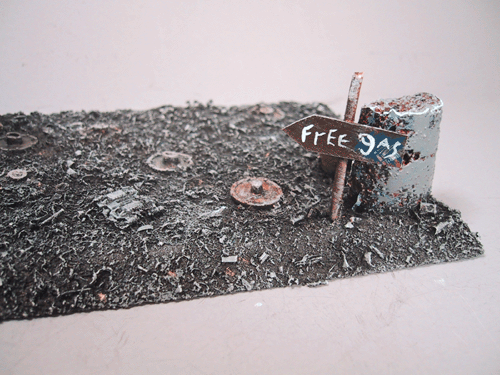
For the minefield section, t he mines were made from dwarven shields with a small slice of plasticard tubing in the center. The slices were filled in with greenstuff, except for one dud.
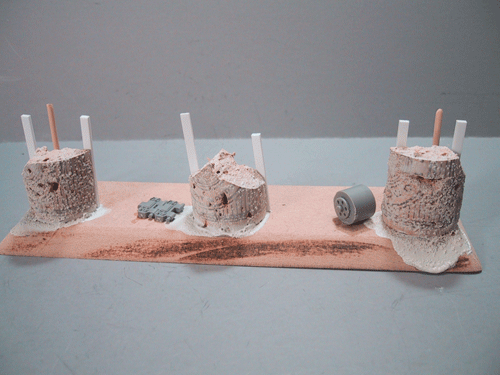
I based the rest of the model using sawdust instead of sand, one advantage here is the textures of the materials will be sufficiently dissimilar than the concrete walls. To base with sawdust, simply brush on a water/glue mixture, and sprinkle on sawdust. When dry, shake off the excess, and repeat. A final coat of just the water/glue mixture is important to really fix the sawdust to the base, and allows for even paint absorption.
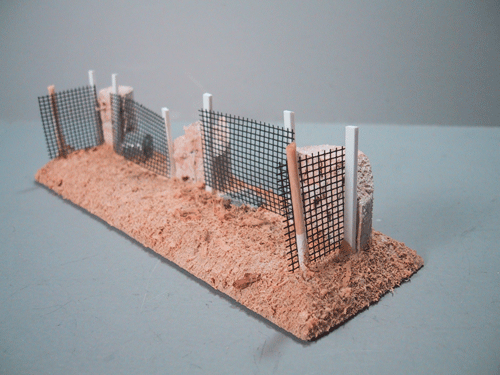
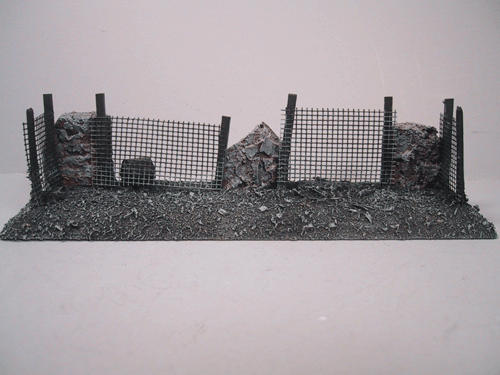
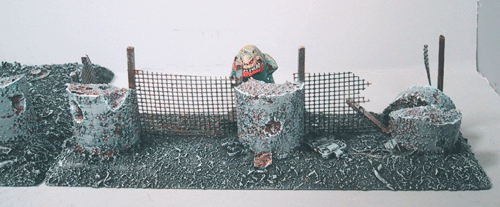
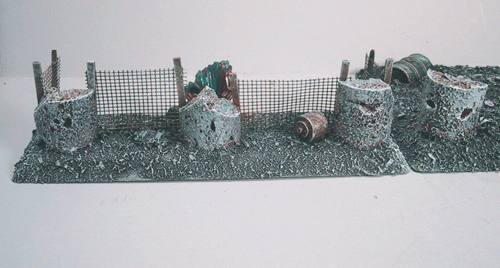
Final touches that were done before painting was a sign for the minefield, and the mesh fencing on the other barriers.
Painting
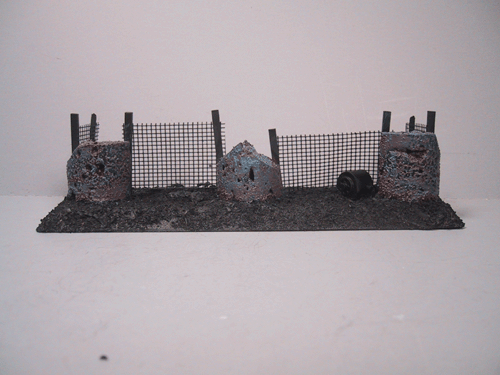
In order to match my home ash waste table, the terrain will be done in grayish hues. The entire model was primed with Citadel black spray primer. First up for the concrete areas was a base coat of dark flesh, followed by a heavy drybrush of shadow gray. When that’s dry, everything but the metal gets hit with a codex gray drybrush coat. Note that if you over do it here, and hit metal parts, that's ok!
Next up is a vermin brown coat over the metal as a rust base. A thin wash of dark angels green was applied over the barrel. Then a light drybrush of tin bitz was applied. Afterwards, fortress gray was than brushed over everything: heavy on the concrete, medium on the terrain, and light on the metal work. As a last step, skull white was "edged" on the concrete, and lightly drybrushed. Finally, a little boltgun metal was also drybrushed over the metal sections.
 |
First step
was cutting 1/4" mdf board for base pieces. The edges were rounded
and smoothed. The large center section is 4 x 6, the others 2 x 6. |
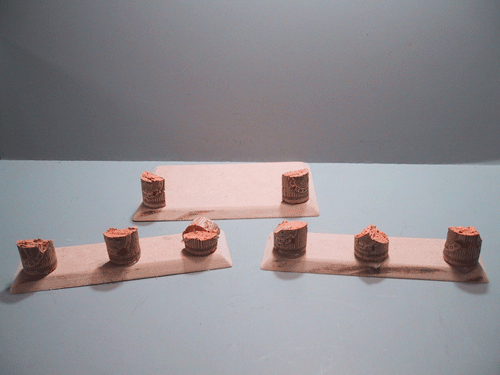 |
wine corks
were cut in half lengthwise, and than again to make the base of a concrete
vehicle barrier |
 |
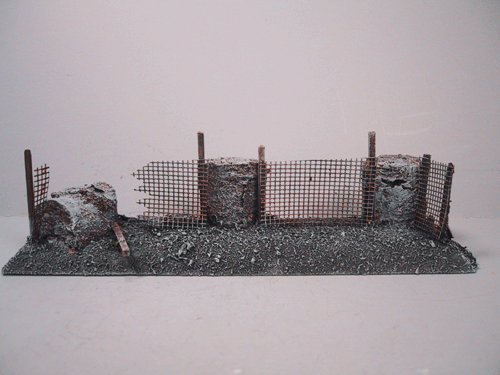
The cork lends
itself well to a crumbled texture. Barrier 1. |
 |
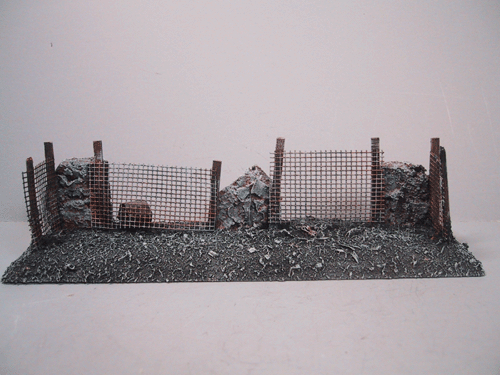
Barrier 2
|
 |
Mine field. |
 |
I used a mixture
of gesso, glue, water, and modeling sand, brushed on the cork to add to
the concrete look. The stakes, both plasticard and toothpicks, are glued
on with super glue. |
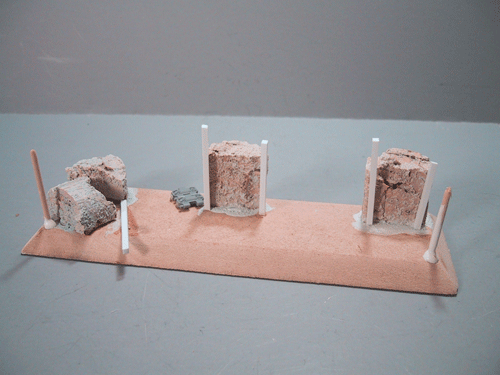 |
Small pieces
of debris were added, the track setions need to have the lower tabs cut
off before glueing. |
 |
|
 |
|
 |
The mines
are dwarven shields with plasticard tubing in the center. |
 |
|
 |
The bases
were flocked with sawdust (for instructions on how to do this, see the
sawdust page) and plasticard
and toothpick stakes glued in. Why the mesh? |
 |
|
 |
|
 |
|
|
to keep the
squigs in, of course! |
 |
|
 |
|
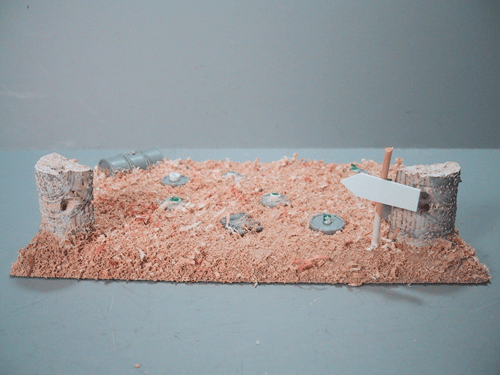 |
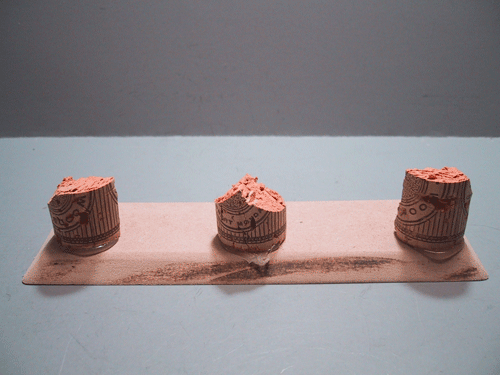
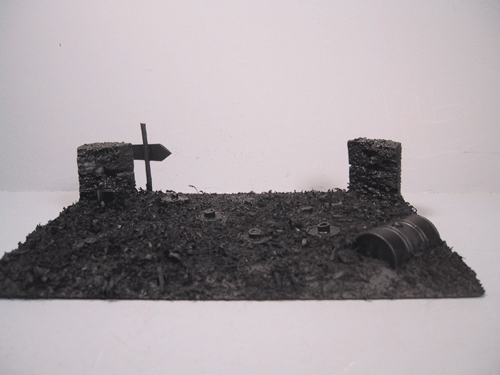
The minefield
is done, after adding again sawdust based ground cover and a few more
mines. There will be clever writing on the sign. |
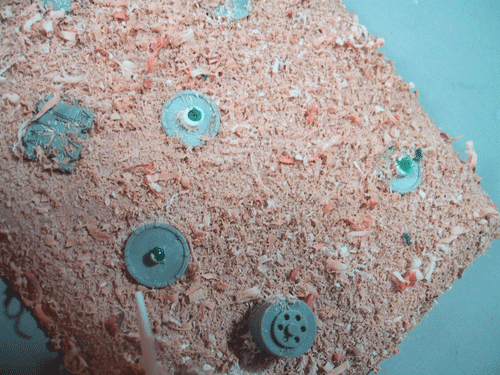 |
Here's a close
up of the mines. Plasticard tubing in the center of each shield, filled
in with green stuff. |
|
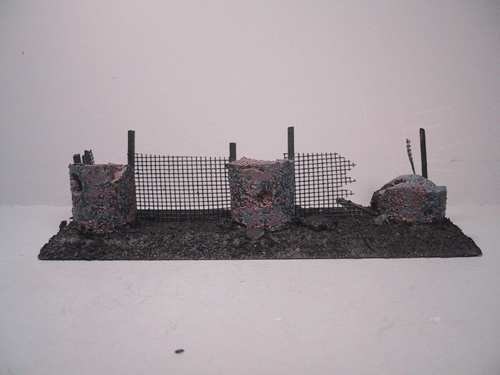
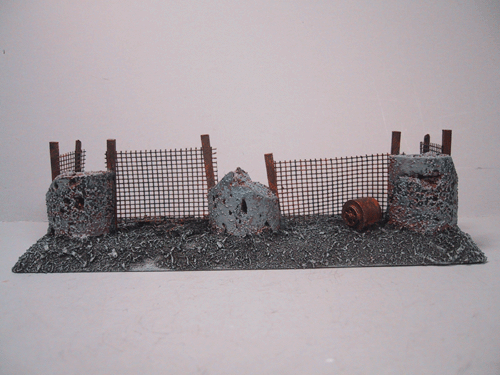
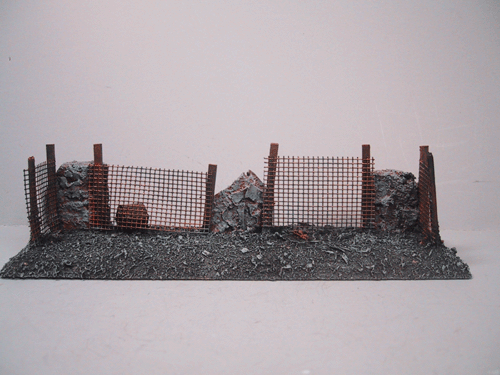
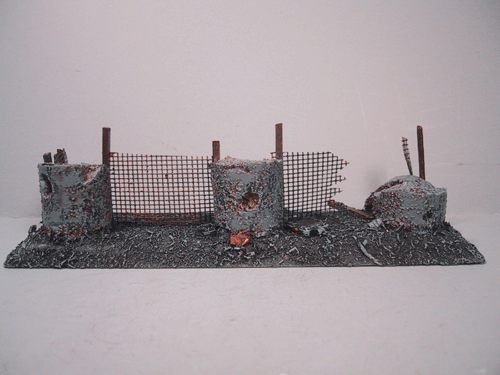
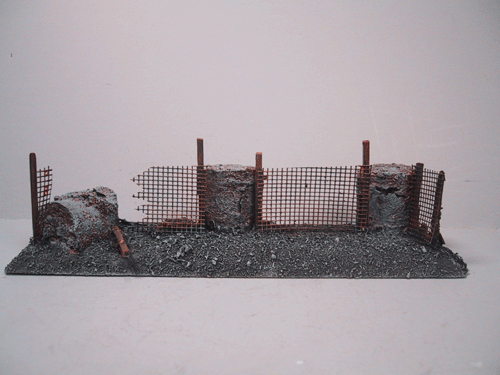
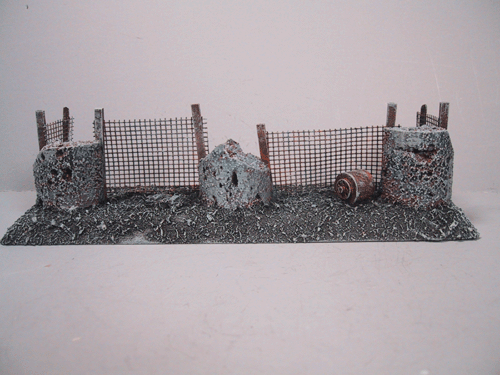
18 inches of yer not gettin' through! All made within 2 days! Paint Shop Time! |
|
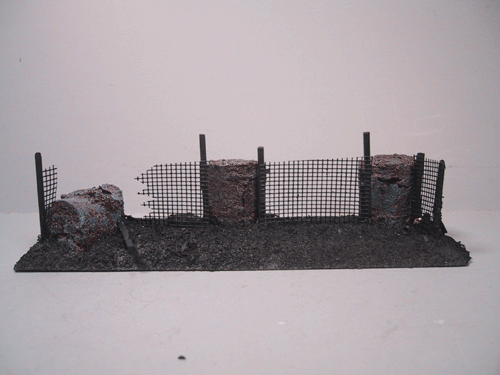
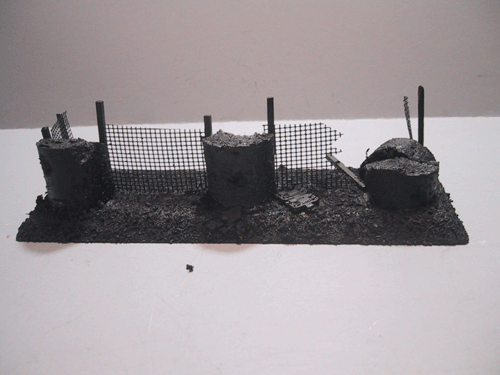 |
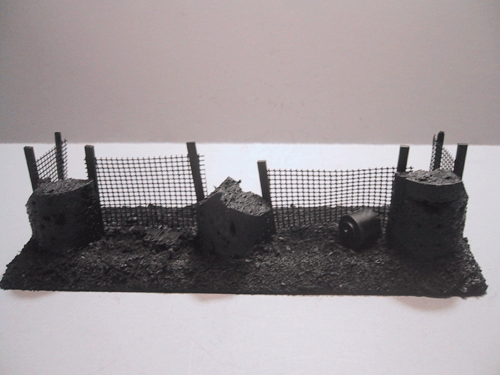
Primered |
 |
Primered |
 |
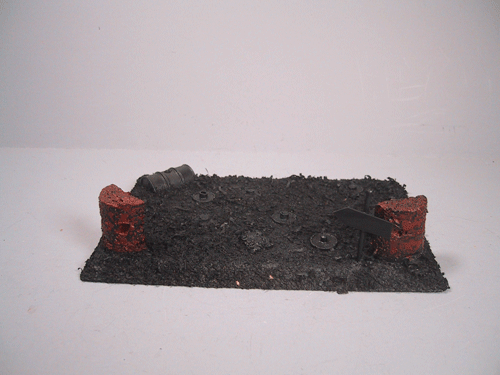
First color
- dark flesh over the concrete parts. |
 |
|
 |
|
 |
|
 |
Next was a
drybrush of shadow grey. |
 |
|
 |
|
 |
|
 |
Next, was
a coat of codex grey drybrush over everything. This works with my terrain
as I use an ash waste theme for my home table. |
 |
|
 |
|
 |
|
 |
The metal
parts were then hit with a vermin brown basecoat (overbrushed) |
 |
|
 |
|
 |
|
 |
A heavy tin
bitz drybrush was applied over the vermin brown parts. |
 |
|
 |
|
 |
|
 |
Next up is
a heavy drybrush of fortress grey over everything, to die the debris in
with the terrain. |
 |
|
 |
|
 |
|
 |
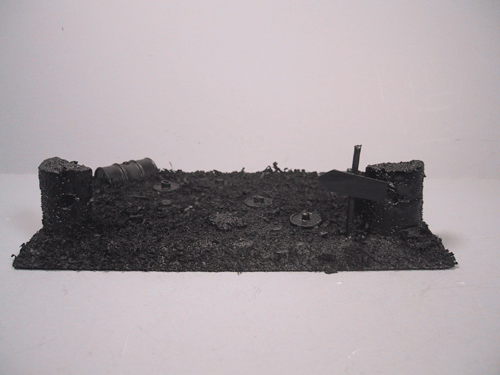
Finally, a
light drybrush of skull white on the terrain, and along the edges of the
concrete, finish the static part of these pieces. |
 |
|
 |
|
 |
|
 |
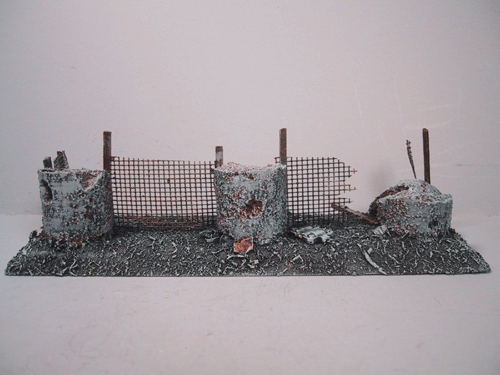
The mine field
section, primed. |
 |
|
 |
Dark Flesh
base coat. |
 |
|
 |
And a drybrush
of shadow gray over the concrete bits. |
 |
|
 |
Than the whole
base gets a drybrushed coat of codex gray |
 |
|
 |
and when that
is dry, the metal parts get hit with a heavy drybrush of vermin brown.
|
 |
|
 |
Over the brown
goes and equally heavy coat of tin bitz. |
 |
|
 |
than the codex
gray drybrush... |
 |
|
 |
and finally
skull white highlights |
 |
|
 |
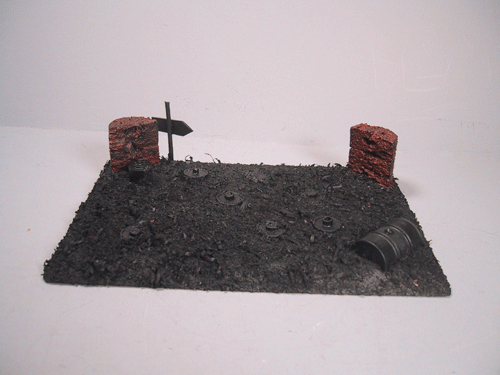
the sign was
painted..... |
 |
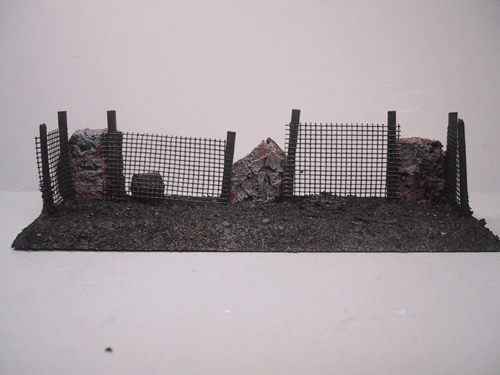
and repainted....think
they'll fall for it? |
 |
and the squigs
added to the fence sections... |
 |
|
 |
|
return to Scarpia's Warhammer 40K
'ere is dem nasty legal bits:
This website is completely
unofficial and is in no way endorsed by Games
Workshop Limited.
Dark Angels, Eldar, Games Workshop, Warhammer, Adepta Sororitas, Adeptus Astartes,
Cadian, Catachan, Citadel, the Citadel logo, Codex, Dark Eldar, 'Eavy Metal,
Falcon, Fire Prism, the Games Workshop logo, Games Workshop, Genestealer, Slottabase,
Immolator, Leman Russ, Mordian, Necron, Ork, Predator, Raider, Ravager, Space
Marine, Tyranid, Ultramarines, and a bunch of other words, are trademarks of
Games Workshop Limited. Used without permission. No challenge to their status
is intended.
©2004. This site is the sole work of Scarpia (Thomas Garbelotti) unless otherwise noted. All content not created by Scarpia is copyrighted by the respective copyright holders.

